

Introduction
In the previous parts of this series, we explored two issues that occur at the very beginning of the TCP lifecycle.
- In Part 1, we focused on “address already in use,” a local bind failure that prevents a server from listening on a port.
- In Part 2, we examined the “connect timeout” error, where a client receives no response to its SYN packets, typically due to firewalls or routing problems.
In this third part, we look at a different connection-establishment failure, namely the “connection refused” error. Unlike a timeout, this error indicates that the client did reach the destination host, but the operating system at the destination immediately rejected the connection attempt. This happens when no process is listening on the target port, and the OS responds to the SYN with an explicit RST packet.
As in the previous parts, the chapter is organized into three subsections:
- TCP Insights – recalls the handshake mechanics and explains how the TCP stack behaves when no listener exists.
- Error Behavior – illustrates what happens when the destination replies with RST instead of SYN + ACK.
- Troubleshooting – provides practical steps for determining whether a service is running, whether the correct port is open, and how to distinguish “refused” from timeout scenarios.
The examples in this part again use the TCP/IP & DNS Sandbox Git repository, making it easy to reproduce both successful and refused handshake attempts. By analyzing server behavior, running client tests, and capturing packets with tools like Wireshark, you can clearly see the difference between a refused connection and a timeout. Understanding this distinction is an essential part of building a complete TCP troubleshooting toolkit.
TCP Insights
To understand the connection refused error, it is essential to recall how the TCP three-way handshake works and how each connection is uniquely identified by a four-tuple of IP addresses and ports. These fundamentals were described in the TCP Insights chapter of the part of this series dedicated to Connect Timeout Error.
Error Behavior
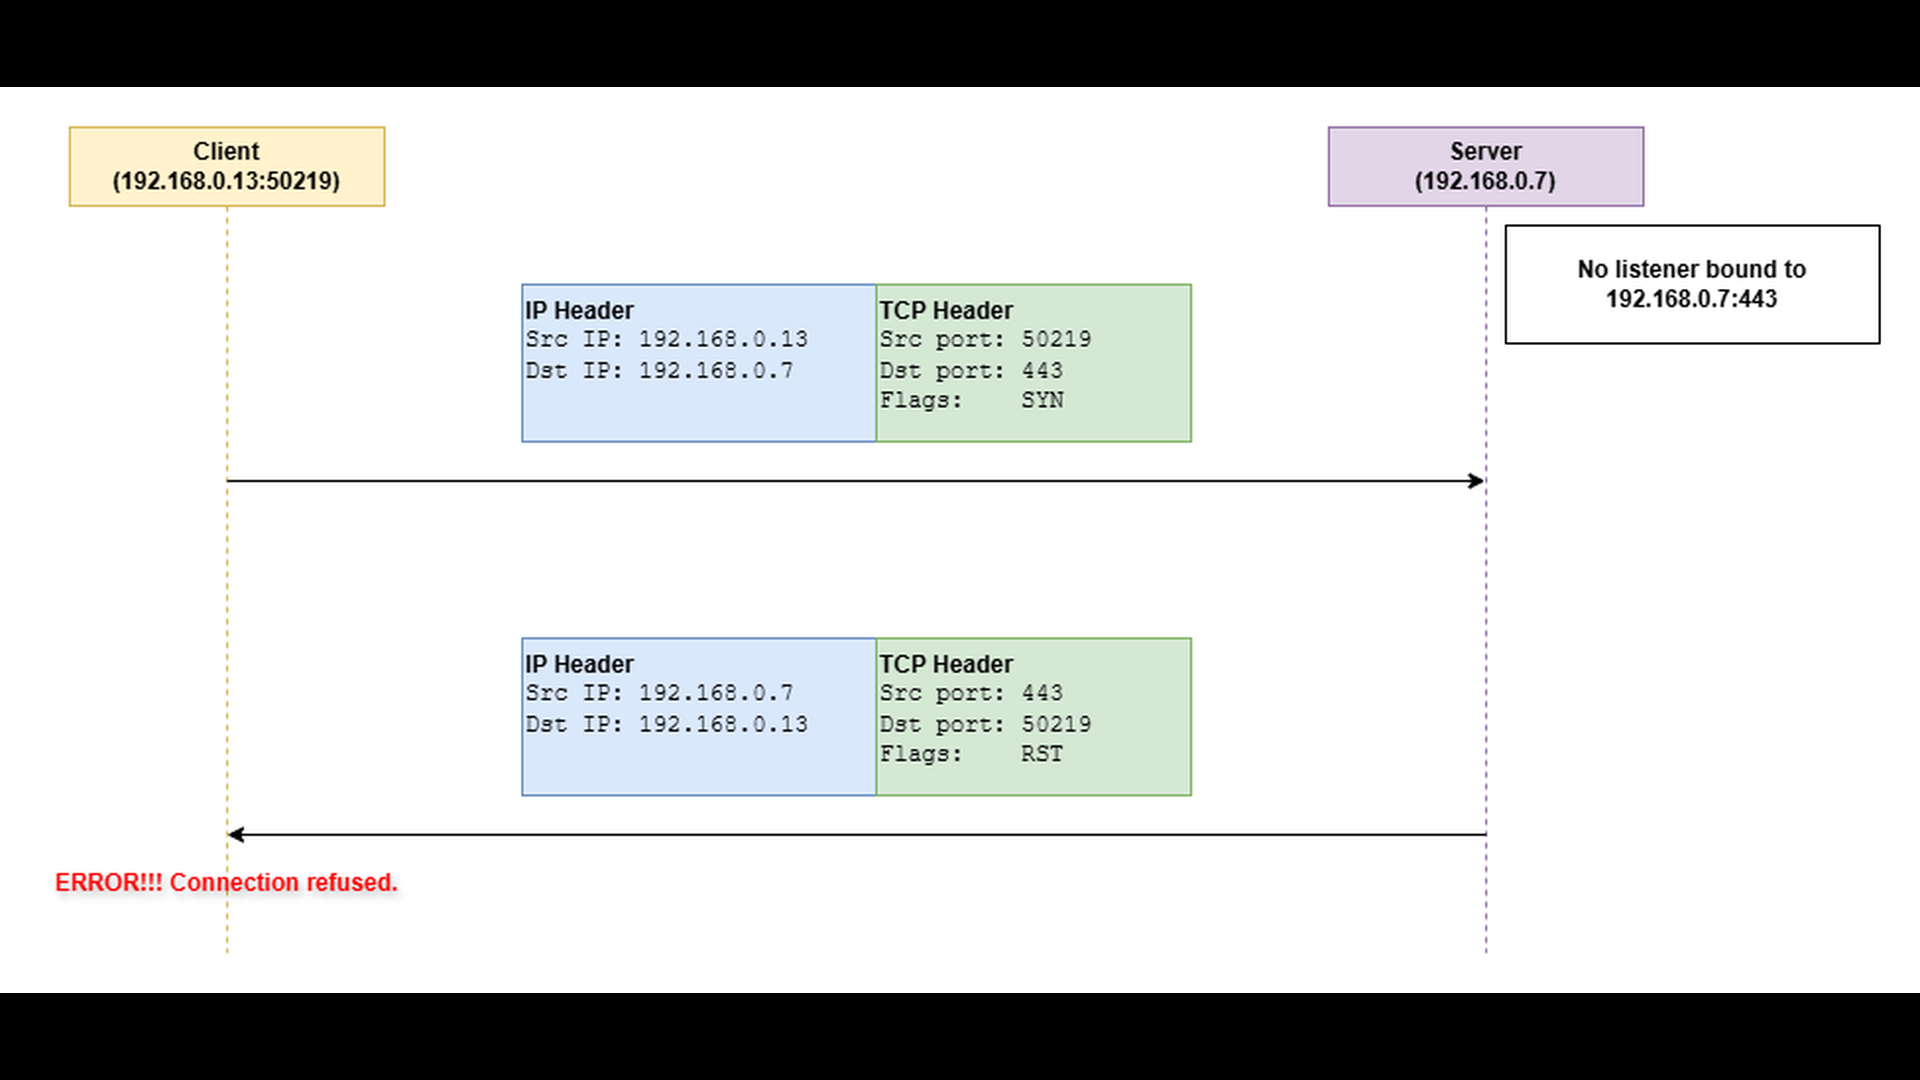
In this case, the client successfully sends the initial TCP segment with the SYN flag set, and it reaches the server’s network interface that owns the destination IP address. This confirms that the network path between the client and server is functional, unlike in timeout scenarios where packets are silently dropped.
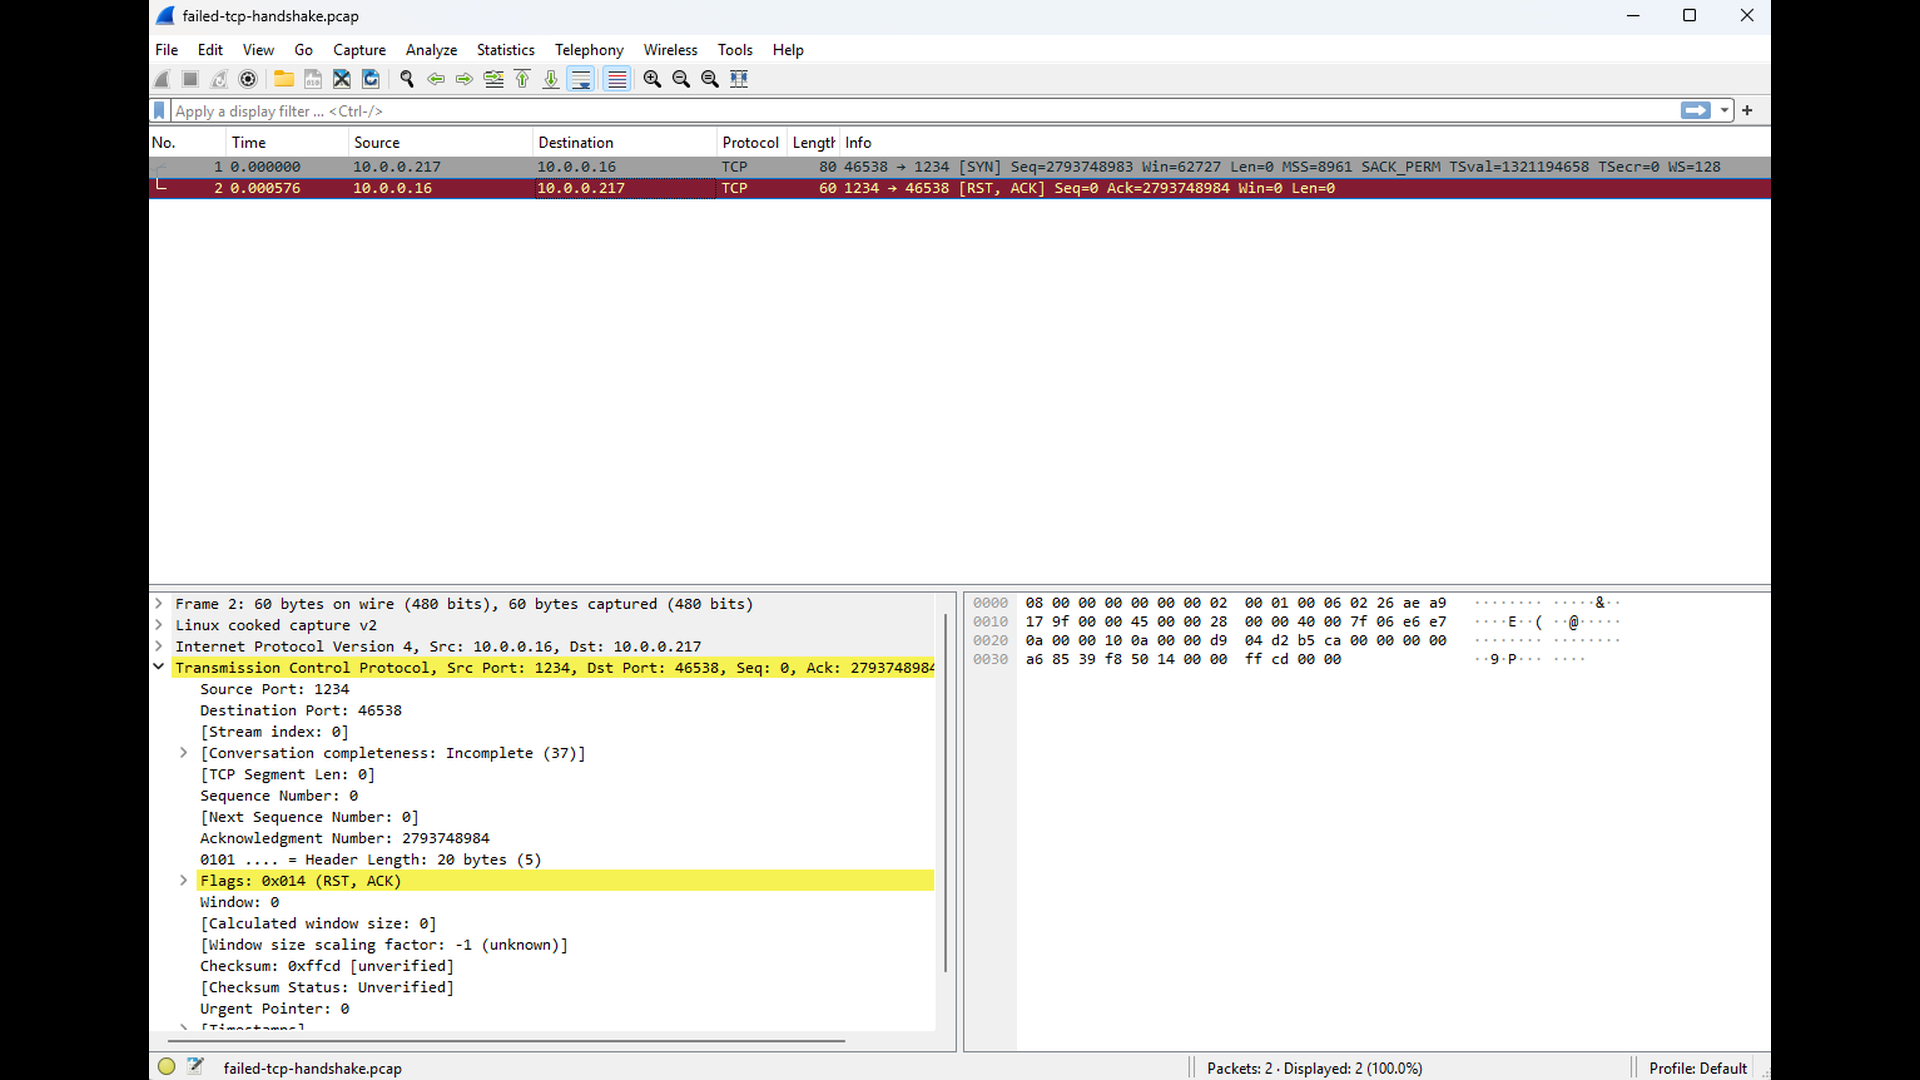
However, when the packet arrives, the server operating system checks whether any process is actively listening on the specified destination port (in this example, TCP port 443). If there is no TCP socket in listening mode bound to that port and IP address, the OS has no recipient for the connection request. According to the TCP specification, the correct response in this situation is to send a reset (RST) segment back to the client. This RST immediately informs the client that the connection cannot be established (see the diagram below).
Troubleshooting
A connection refused error usually points to a configuration or application-level issue rather than a network problem. To confirm the cause:
- Use tools like netstat, ss, lsof or Get-NetTCPConnection PowerShell cmdlet on the server to verify that the port is listening.
- Confirm that the expected service is running and bound to the correct IP address and port.
To illustrate how the “connection refused” error occurs in practice, we will use the TCP server and TCP client applications from the TCP/IP & DNS Sandbox repository. The demo runs on the AWS infrastructure provisioned by the accompanying Terraform configuration, but the applications behave the same way in any environment.
The following screenshots illustrate a normal server–client interaction before demonstrating the “connection refused” error scenario. The first screenshot shows the TCP server running and accepting incoming client connections. For clarity, the server prints messages in different colors depending on which client the data comes from.
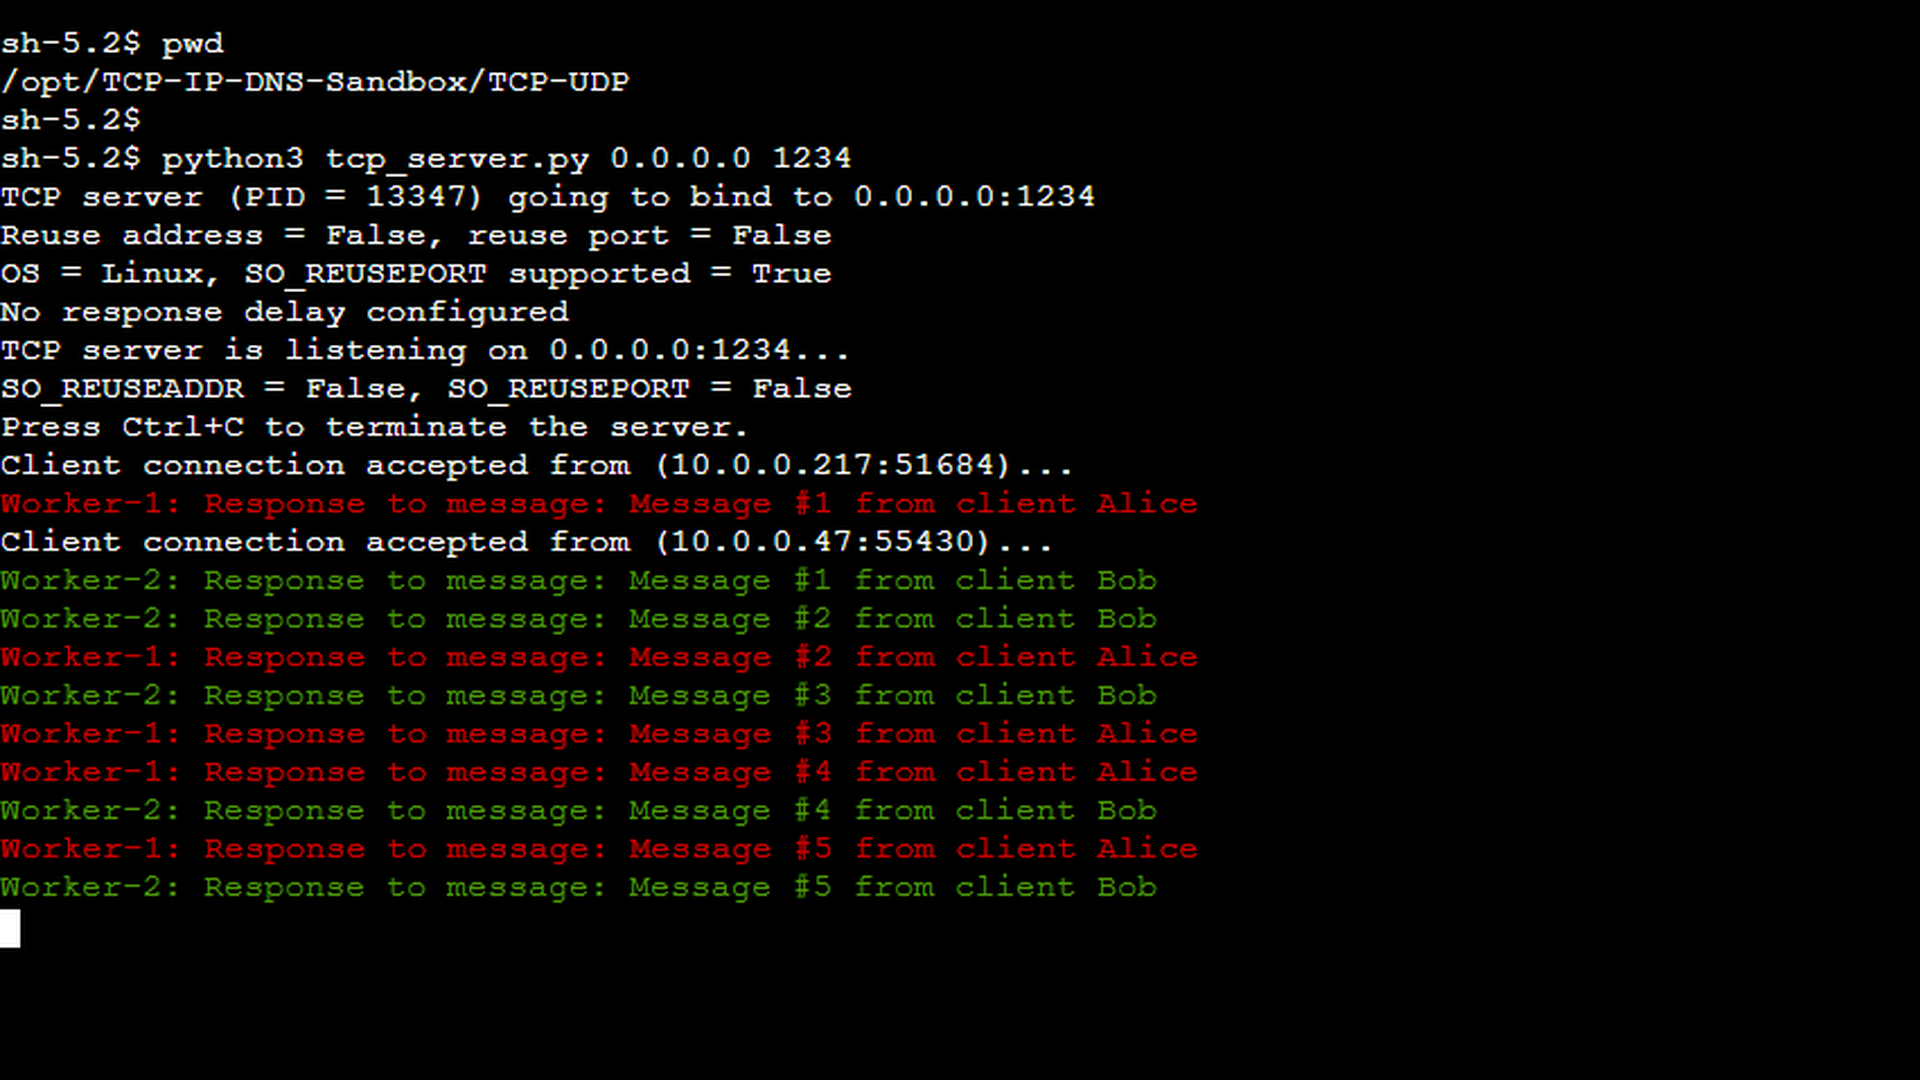
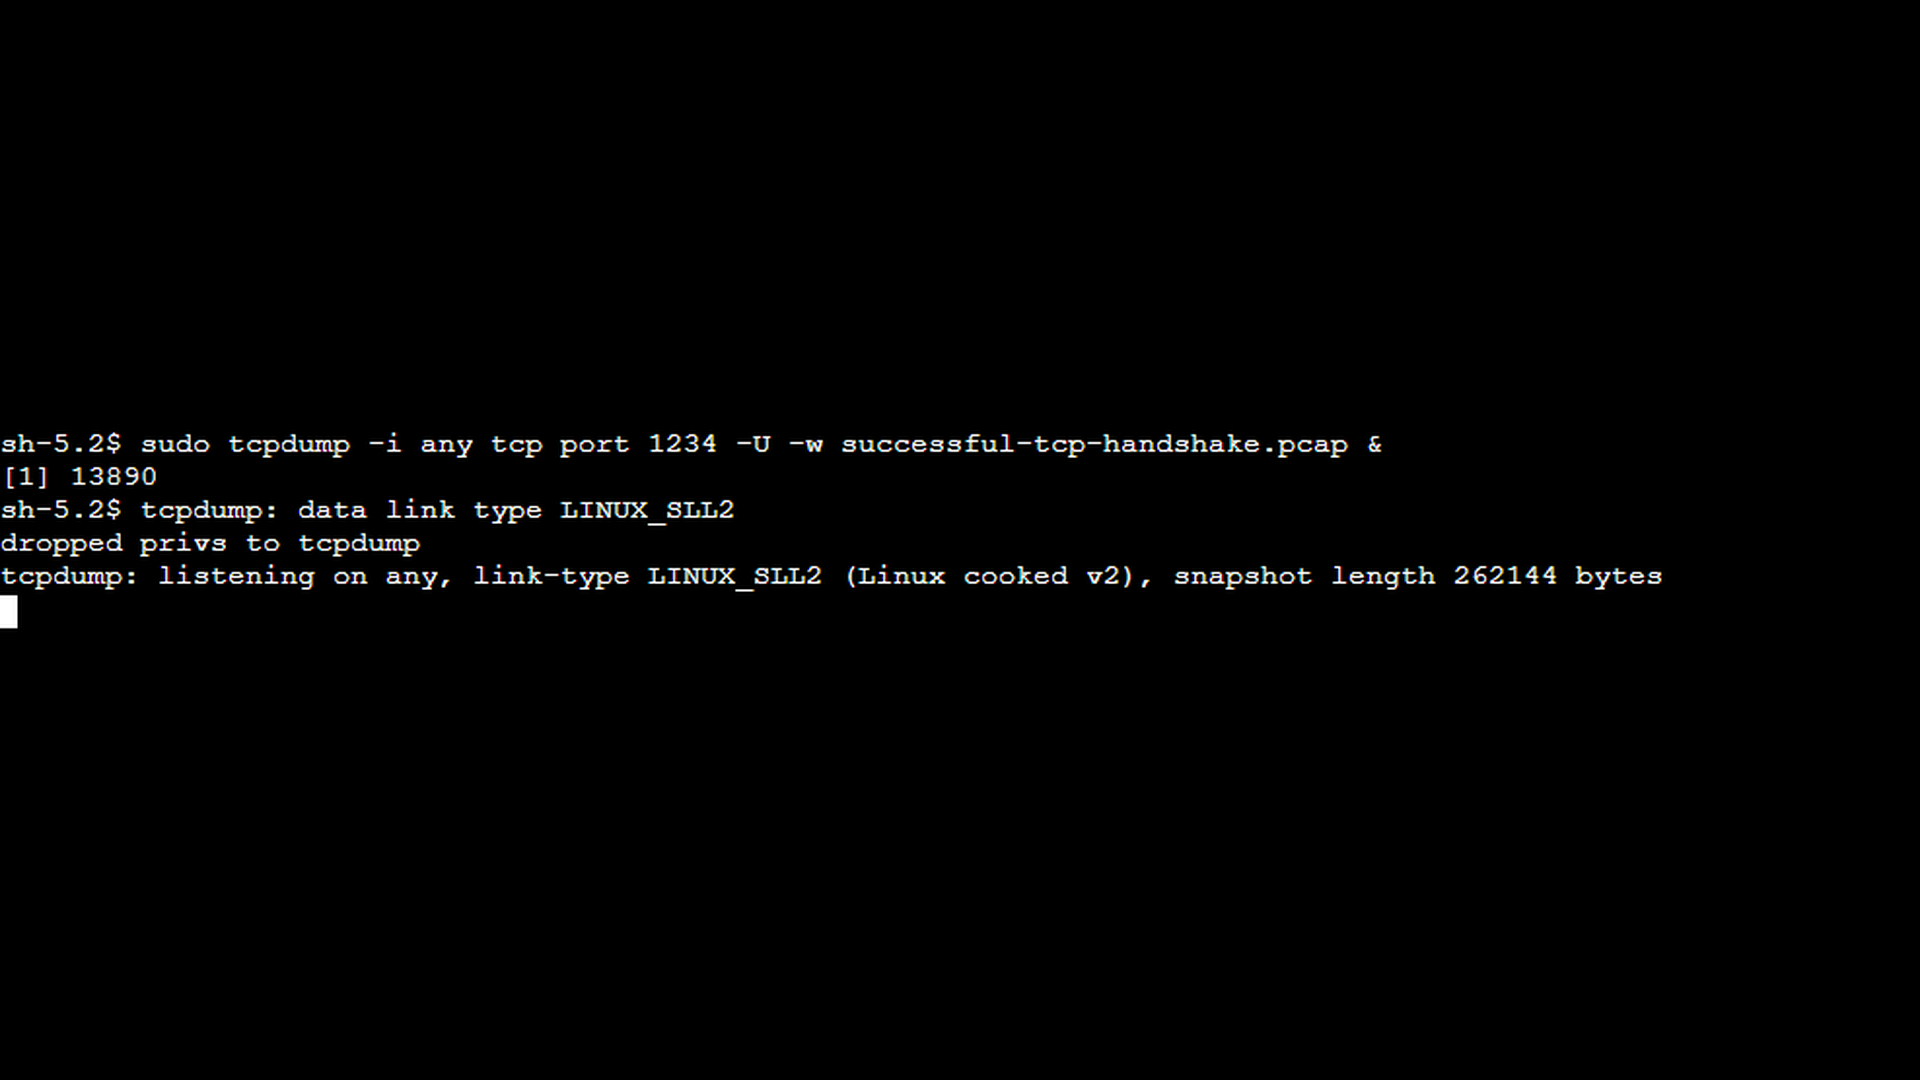
Before starting the client, network capture must be initiated so the exchanged packets can be analyzed later. The following screenshot shows how to start the capture using tcpdump.
The command-line options used here were already explained in a previous part of this series, so they are not repeated. For this experiment, tcpdump was run on the client side.
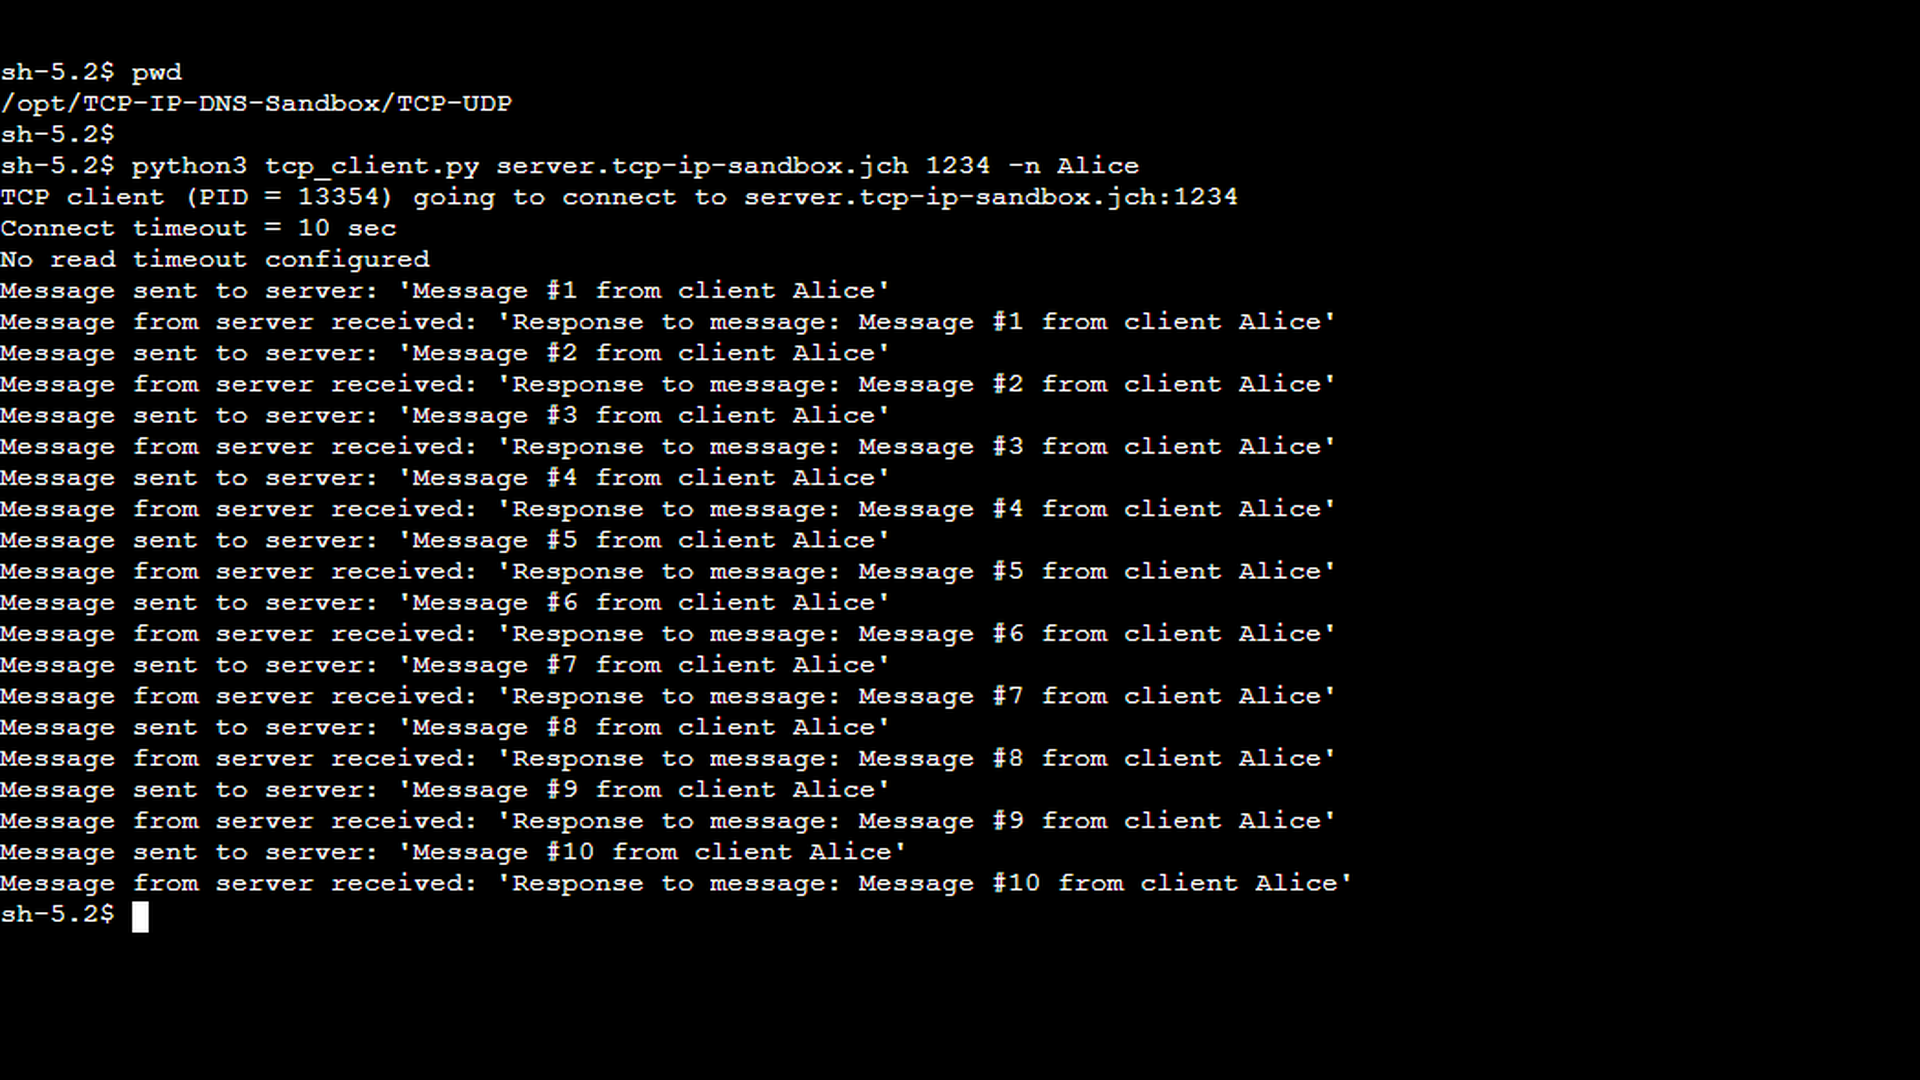
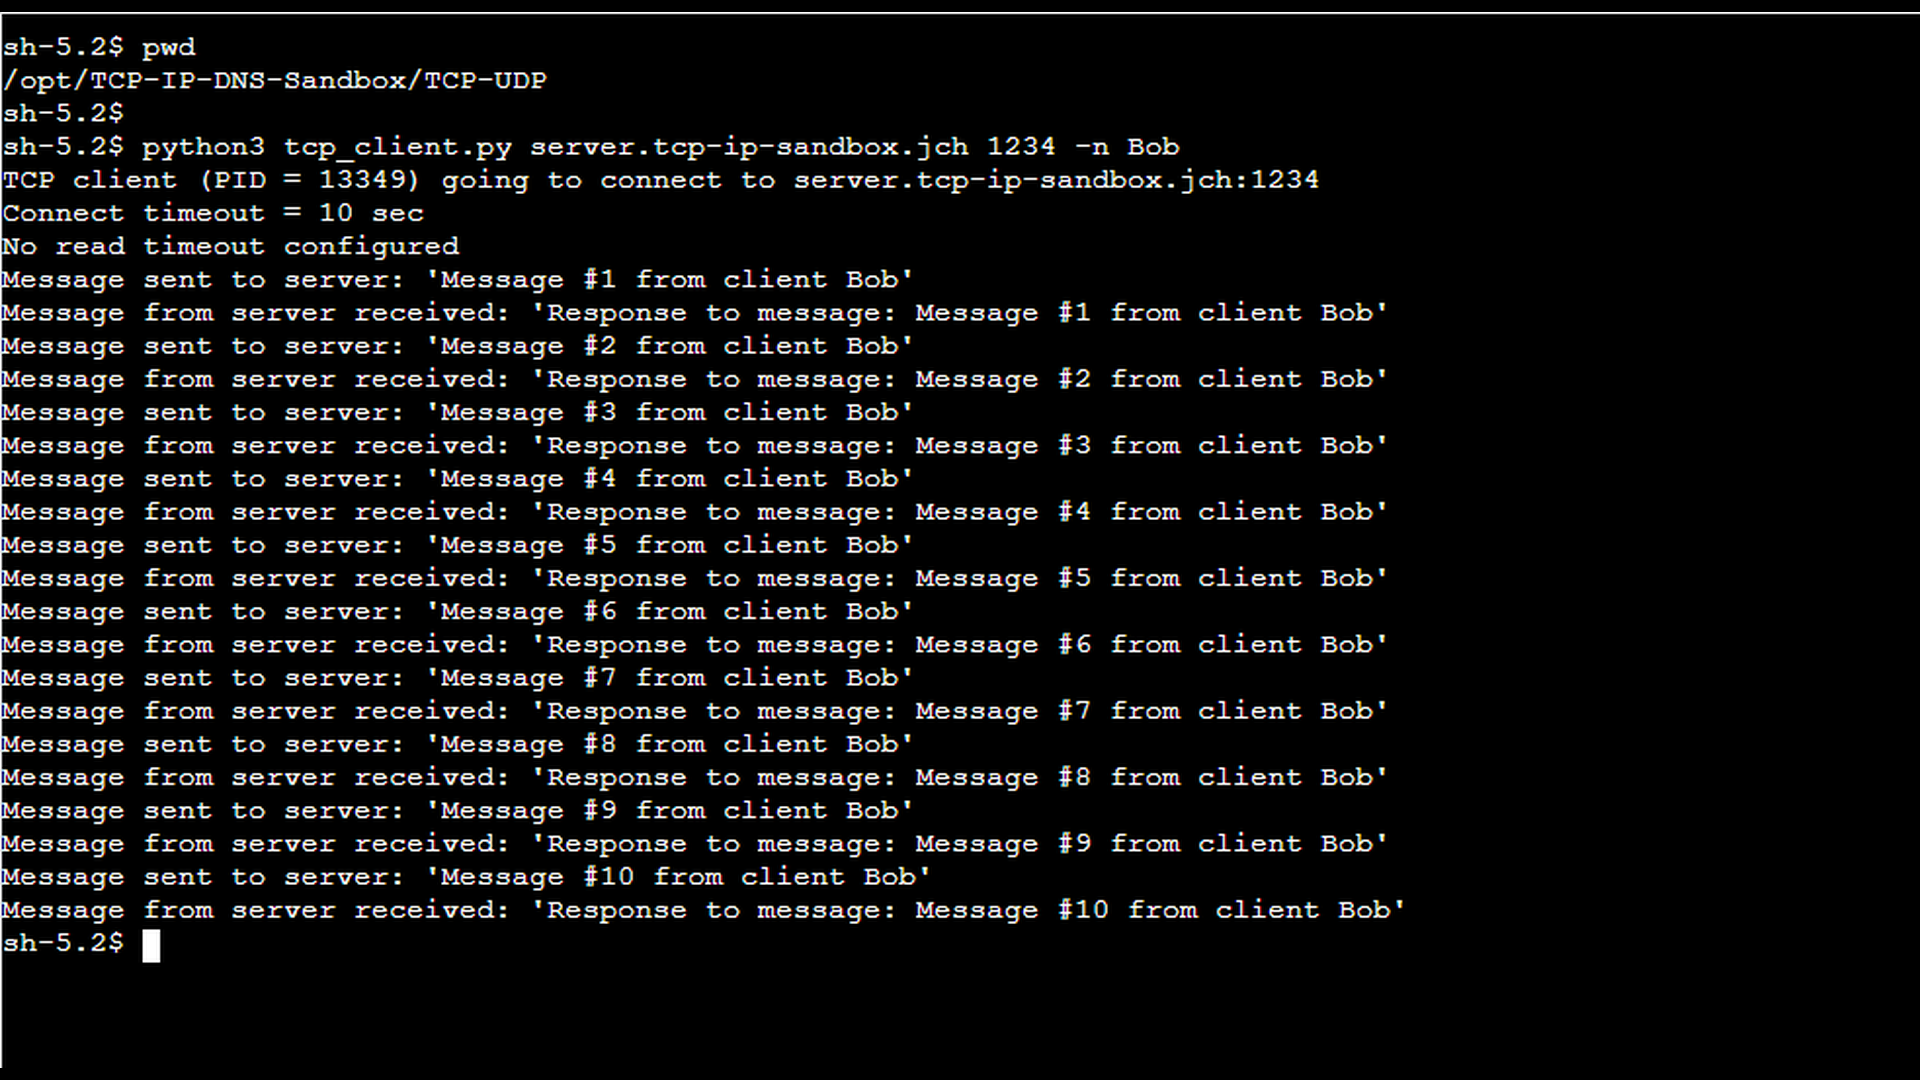
The next two screenshots show two separate clients successfully connecting to the server. Each client was started using the -n option, which allows assigning a custom client name. These names are included in the messages sent to the server and are clearly visible in the server’s output, making it easy to distinguish which client is communicating at any given moment. The clients are connecting to the server using the DNS name assigned to the server by the Terraform configuration. IP addresses could be used as well.
The established connections are also visible in the server’s netstat output. You can see three entries associated with the server’s PID: one in the LISTEN state corresponding to the server’s listening socket, and two in the ESTABLISHED state representing the active connections from the two clients. As the two clients connected from two different EC2 instances, the two entries in the ESTABLISHED state have distinct IP addresses in the Foreign Address column.
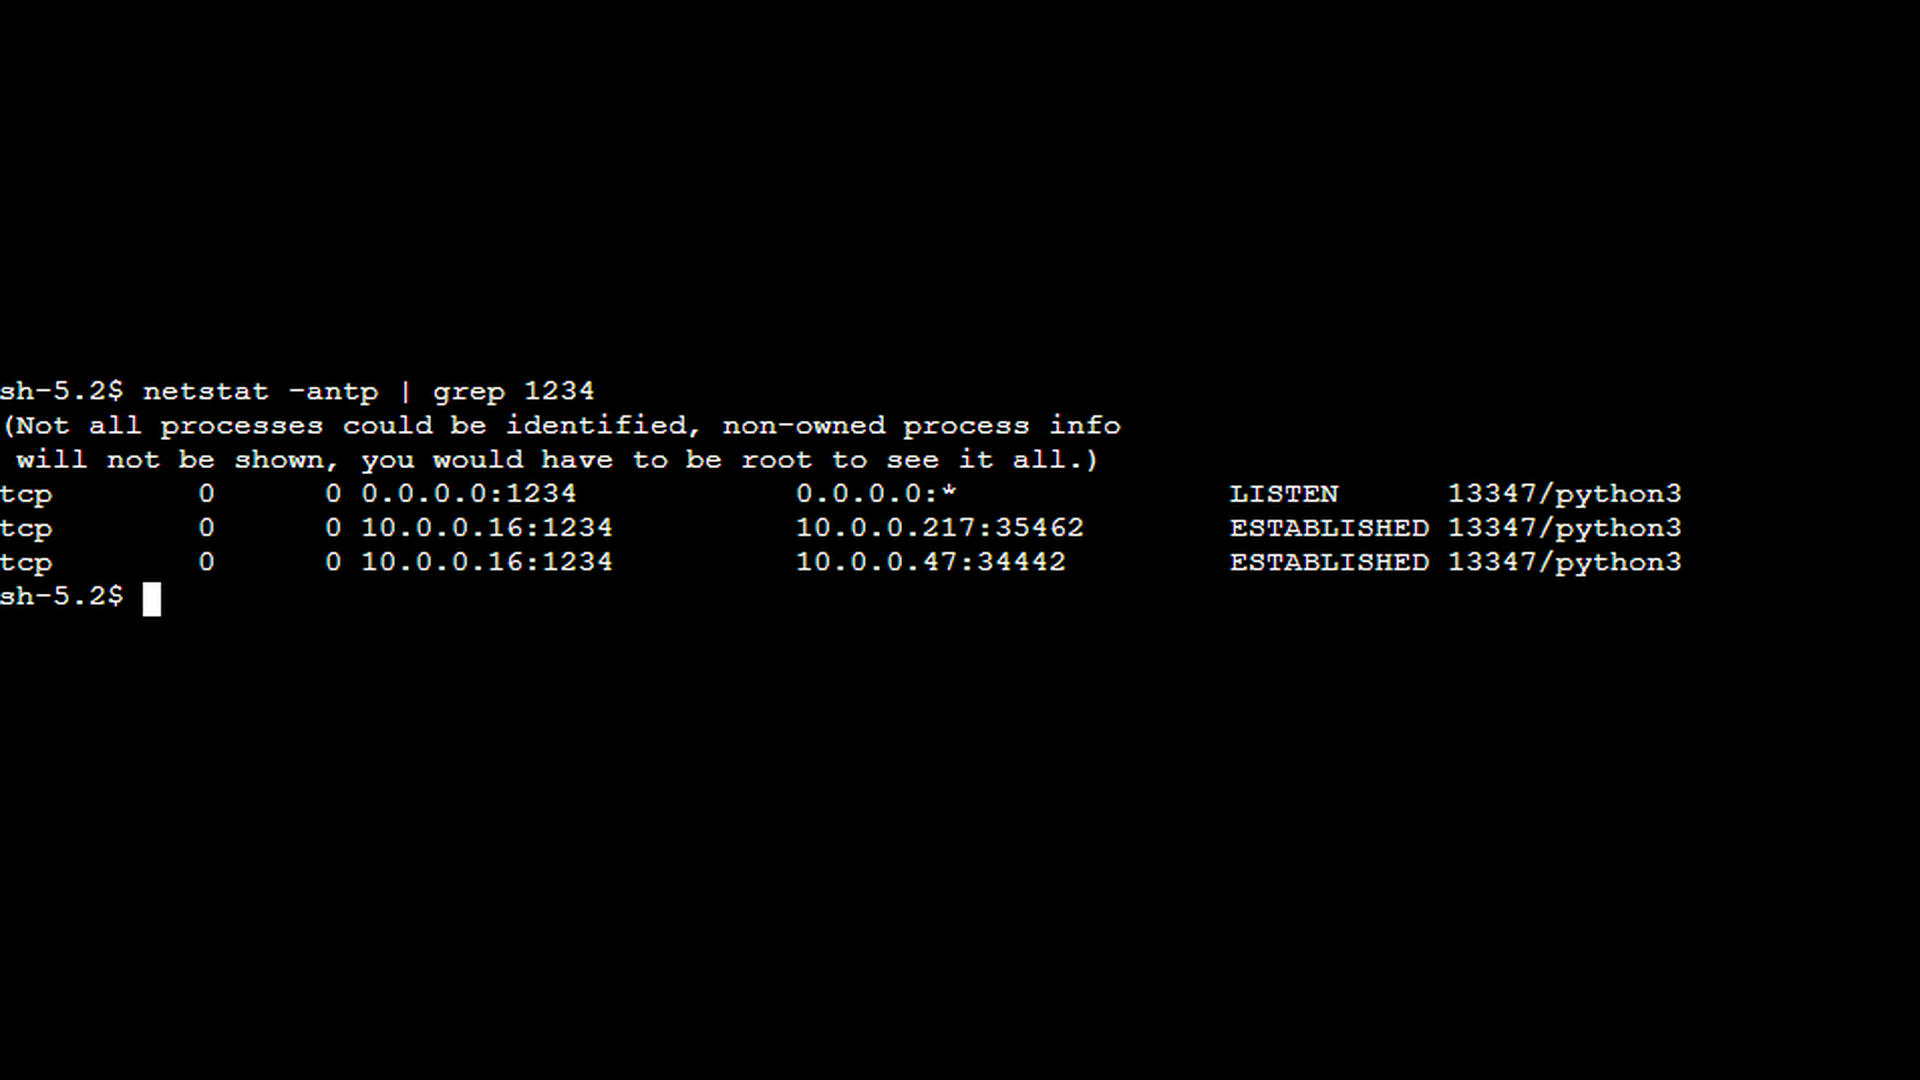
Together, these screenshots confirm that the server is running, listening on the correct IP address and port, and capable of handling multiple concurrent client connections.
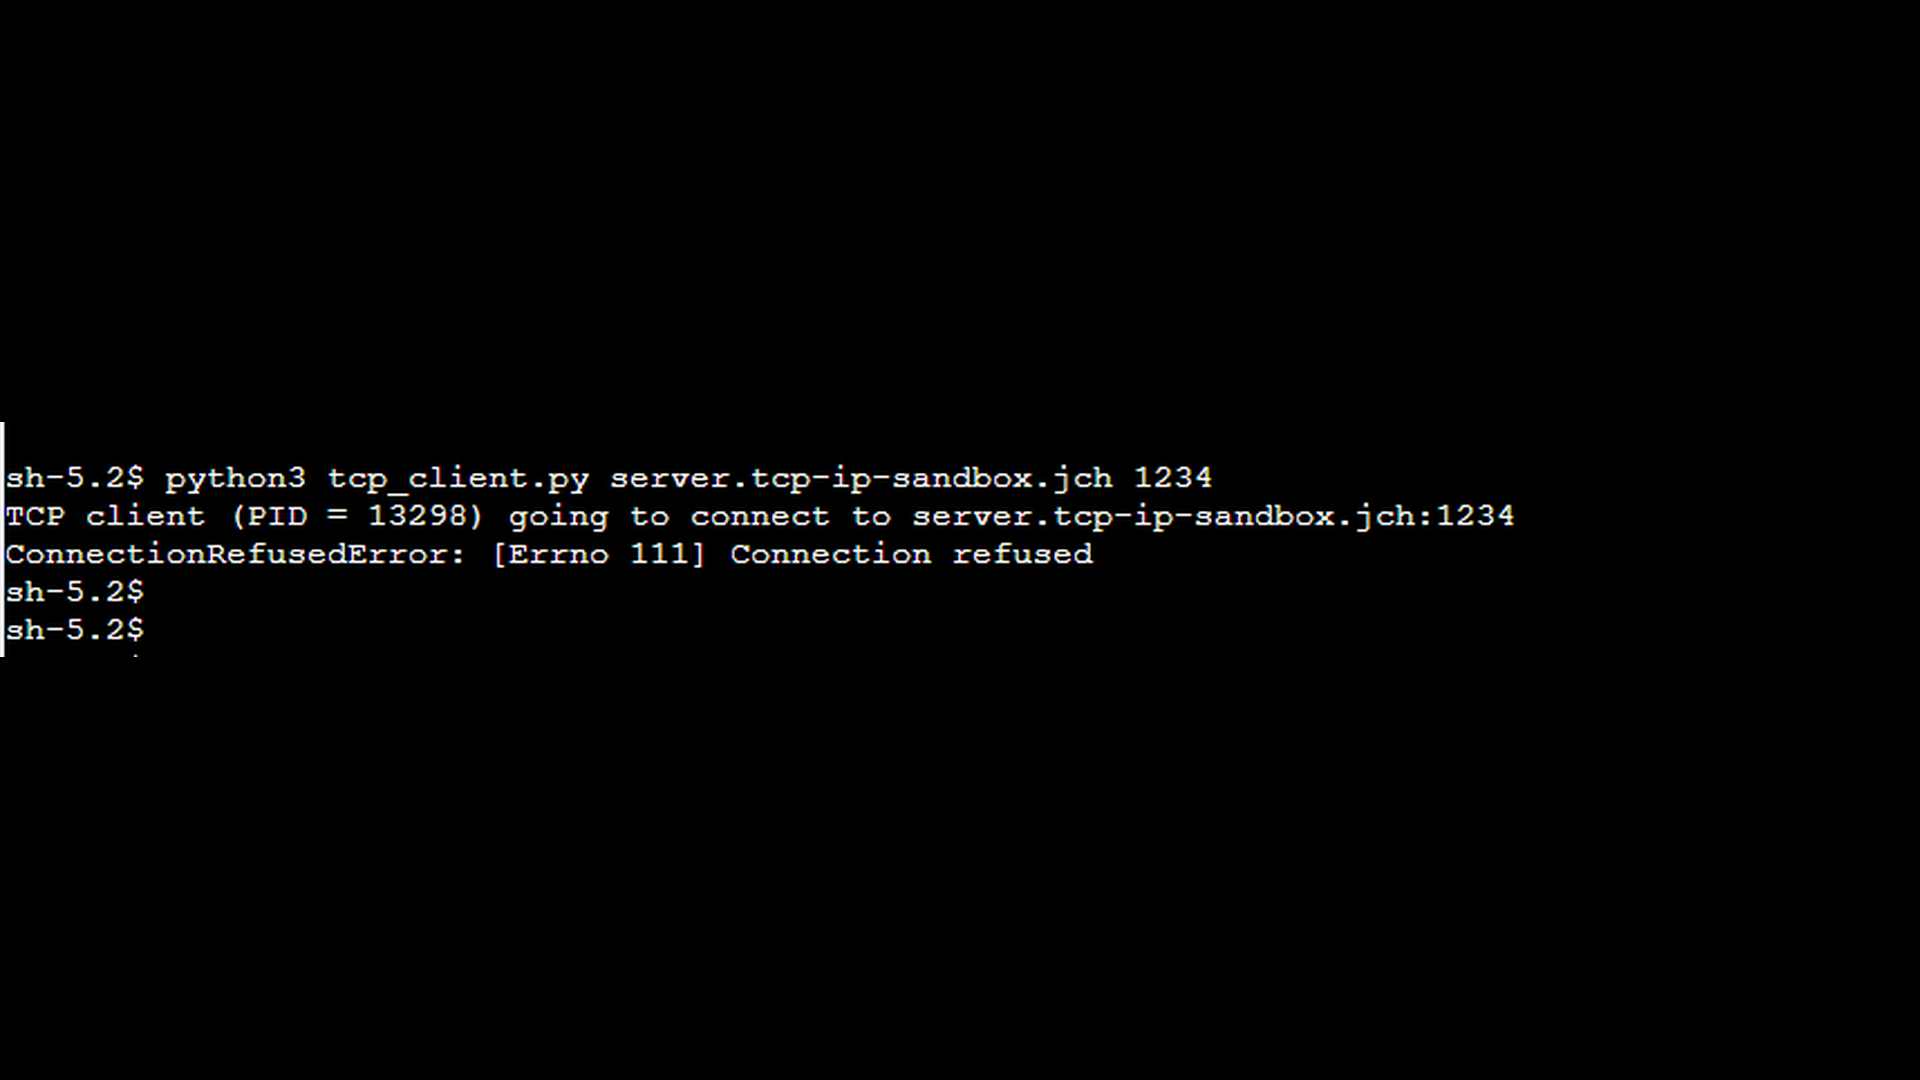
To demonstrate the “connection refused” error, the server was intentionally stopped and a new client connection attempt was made. Since no process was listening on the target IP address and port, the operating system immediately rejected the connection attempt and returned a RST segment to the client. The following screenshot shows the resulting error message on the client side.
When troubleshooting errors like this, and you have access to the host where the server should be running, you can use netstat (or an equivalent tool) to verify whether the target port is actually open. After reading the earlier parts of this series, you should already be familiar with how to check for listening sockets and identify whether a service is bound to the expected IP address and port.
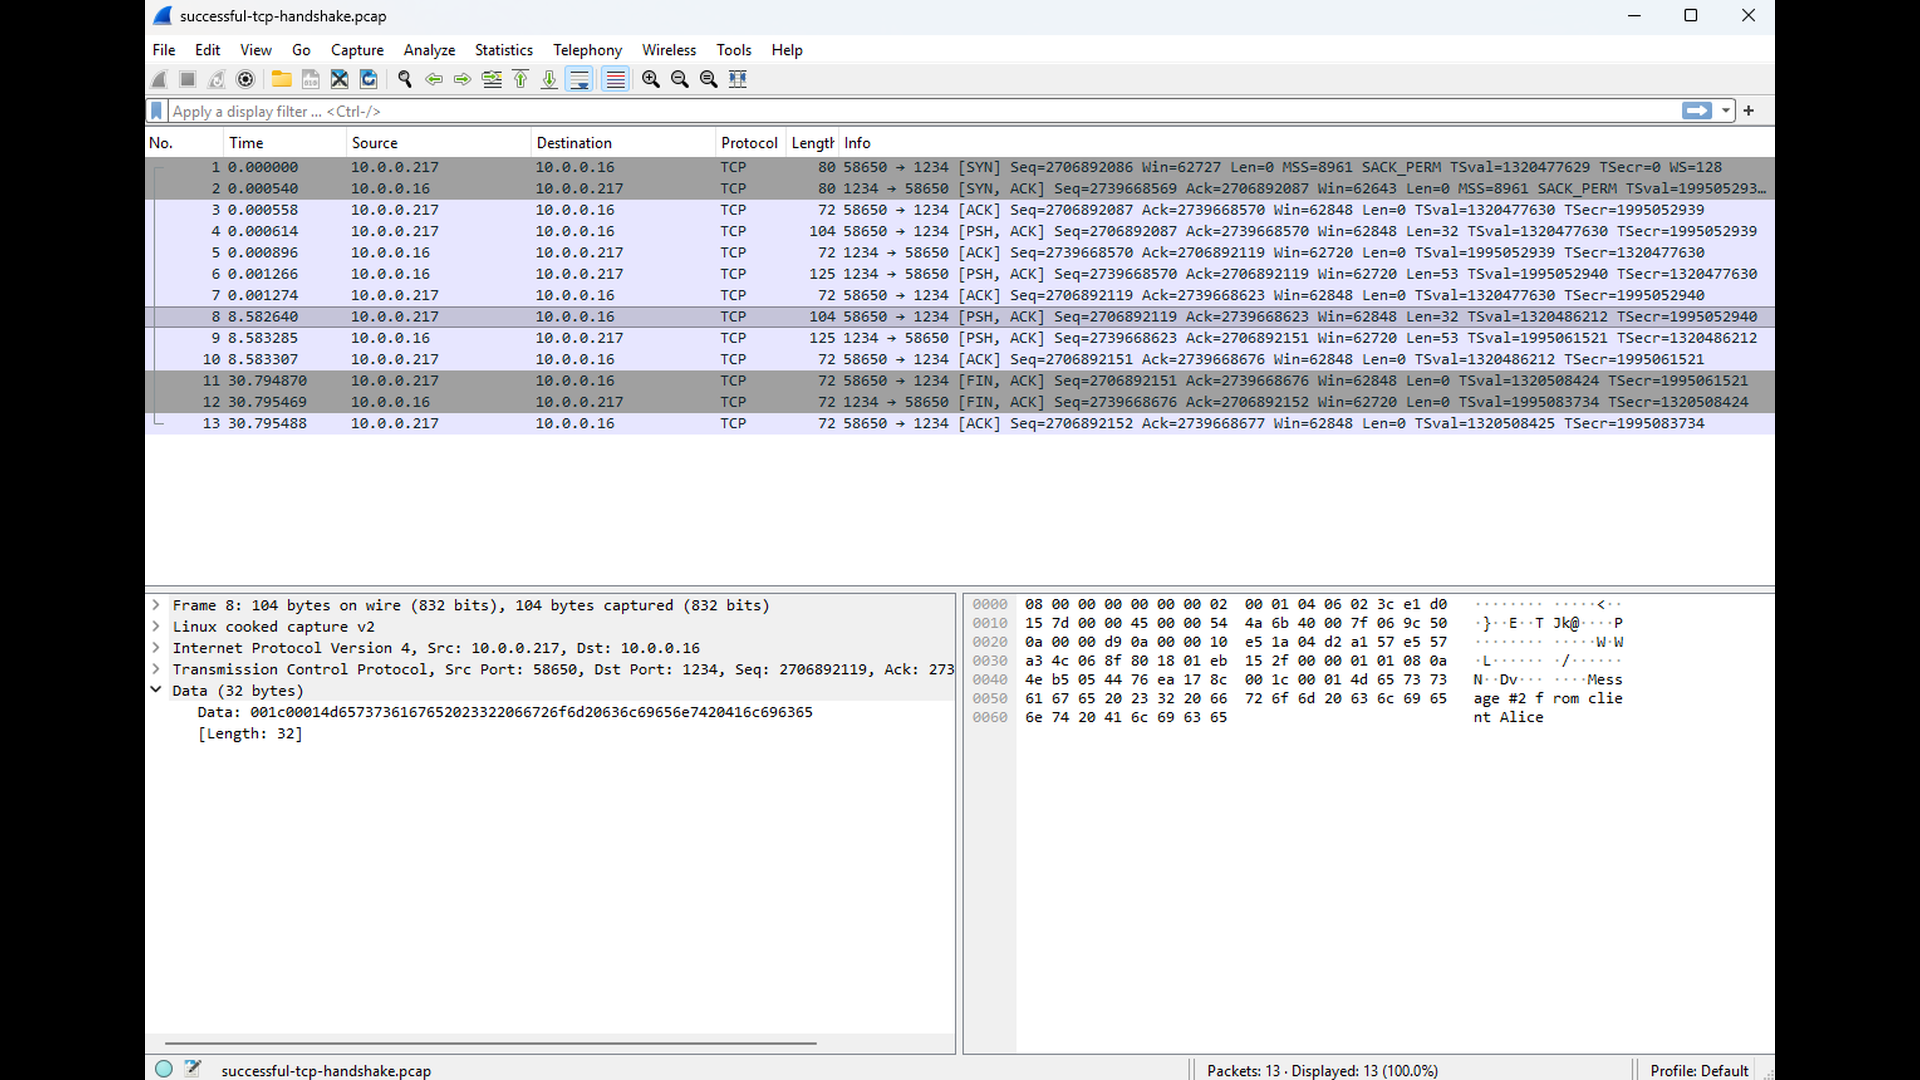
To complement the previous examples, the following two Wireshark screenshots illustrate what happens on the wire during a successful TCP handshake and during a “connection refused” scenario. The first screenshot shows a successful three-way handshake: the client sends a SYN, the server responds with SYN+ACK, and the client completes the handshake with an ACK. After these three packets, the connection is fully established and ready for data transfer.
The second screenshot captures the handshake when the server is not running. The client still sends the initial SYN, but since no process is listening on the target port, the server’s operating system immediately replies with a RST packet instead of SYN+ACK. This is what triggers the “connection refused” error on the client side.
Conclusion
A “connection refused” error indicates that a client successfully reaches the destination host, but the connection attempt is explicitly rejected. The client’s SYN packet arrives at the target IP address and port, and the operating system responds immediately with a RST because no process is listening on that port. This behavior clearly distinguishes a refused connection from a timeout, where no response is received at all.
By understanding how the TCP stack handles incoming SYN packets when no listening socket exists, you can quickly determine whether a service is running, bound to the correct address, and listening on the expected port. Tools such as netstat, ss, PowerShell’s Get-NetTCPConnection, and packet capture utilities like tcpdump or Wireshark make it straightforward to confirm the absence of a listening socket and observe the RST on the wire.
With this part, we conclude the series of errors related to opening and establishing TCP connections. In the next part, the focus shifts to a different class of problems that occur after a connection has been successfully established. Part 4 examines the “connection reset by peer” error, which arises when one endpoint abruptly terminates an active connection rather than closing it gracefully. Understanding this transition – from connection setup to data transfer and teardown – is essential for building a complete mental model of TCP error behavior and for troubleshooting real-world networking issues effectively.

